THE LIST OF SFUFF...
2lb or 4lb cottage cheese or yogurt container with raised center bottom, and lid
1/16" steel braded cable, 5-10 ft
16-14awg cable stud conectors #6 size hole,
1"x5/16" steel tubbing, crimps
1"x3/8" steel tubbing, crimps
1/4"x1/2"x6" plastic or wood material,plunger
1/4"x1/4"x12" plastic or wood material, support sticks
1/4" flat and regular washers,
4 sets, 2mm allen bolts,nuts,washers,
4 servo screws,
3mm wood screw,
Heavy duty kite string,
primer,Chevy orange engine paint, clear coat
|
 WHAT YOU START OUT WITH....
Go to the grocery store and get eather a 2 lb or 4 lb cottage cheese/ yogurt container. make sure that is has a raised center portion. This is what the lid sits on and seals the water in.
WHAT YOU START OUT WITH....
Go to the grocery store and get eather a 2 lb or 4 lb cottage cheese/ yogurt container. make sure that is has a raised center portion. This is what the lid sits on and seals the water in. |
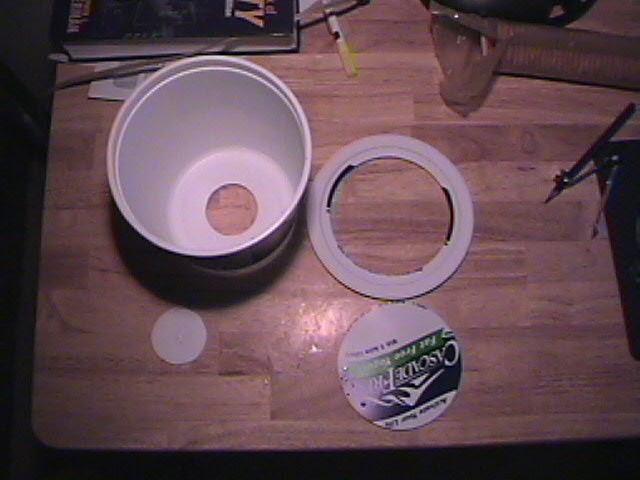
 Cut out the dumping hole out of the bottom. If you could imagine cutting it from the bottom with the point of the knife pointing towards the outside of the bucket at a really steep/ flat angle. You should be able to see the angled cut from the inside, not the bottom. What this does is eliminates any material from sticking up higher than the flat surface on the inside when you cut it out. There...a picture is worth a thousand words!!
 |
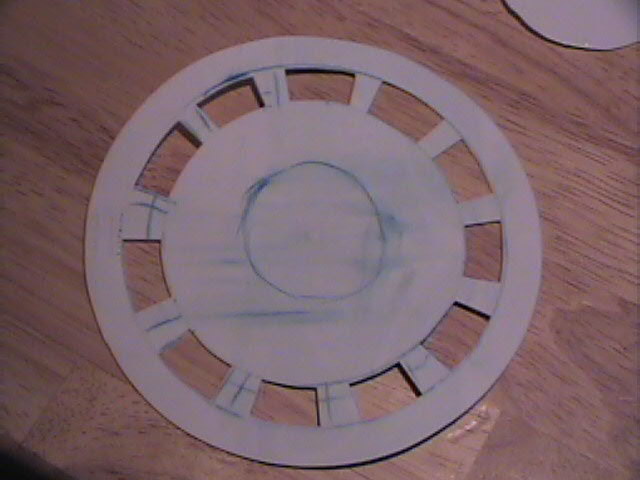 Next, you cut out the plunger from the lid. Make it just about 1/8" smaller all the way around than the bottom of the bucket. Mark the circle for the dumping hole and cut out the vent holes, leaving enough room for the lid to slid around and not uncover the dumping hole by a vent. Leave enough material between the vents to keep it stiff. The lid will most likely be warped but the weight of the water will flaten it out when its full.
 |
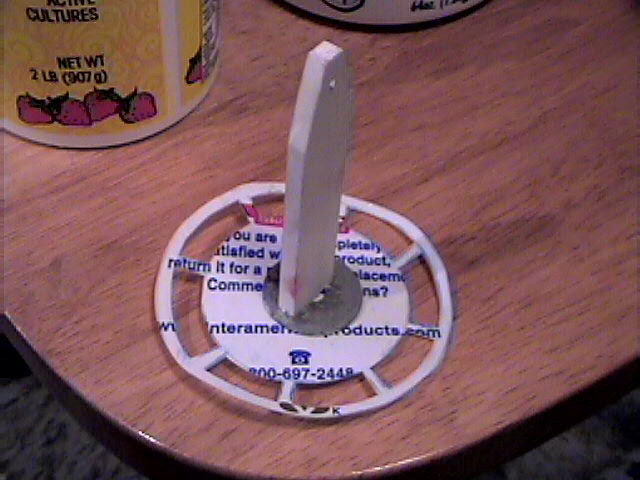 Use the 1/4" x 1/2" material to make the arm for the plunger. No taller than 1" shorter than the buckets total height, about 4" is good. Take the 3mm screw and the 1/4" washer and screw it through the lid that has been cut. Then screw that into the plunger arm with the flat washer between the lid and the arm. The small washer is on the botom of the lid and you'll be able to see it through the hole in the bucket.
 |
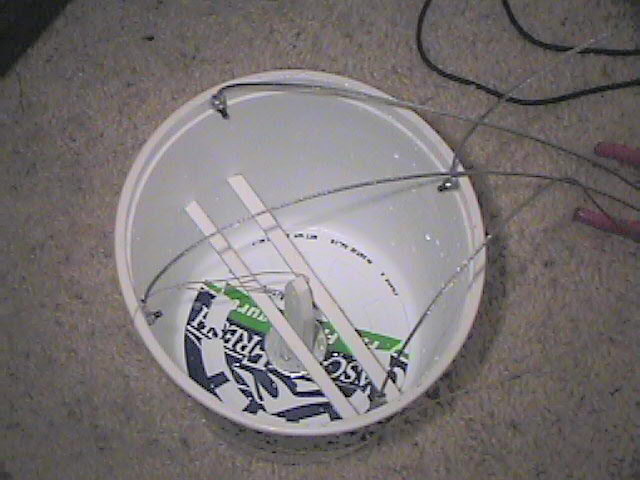 Next, take the 1/4"x 1/4" material and make some supports for the bucket. They keep the plunger in the bucket when it is tipped over getting filled. use the servo screws through the side of the bucket into the supports about 3 inches up from the bottom of the bucket. I take these out when painting and you have to take one out to get the plunger in and out. I give it a slight angle on each end to keep it off center.
 |
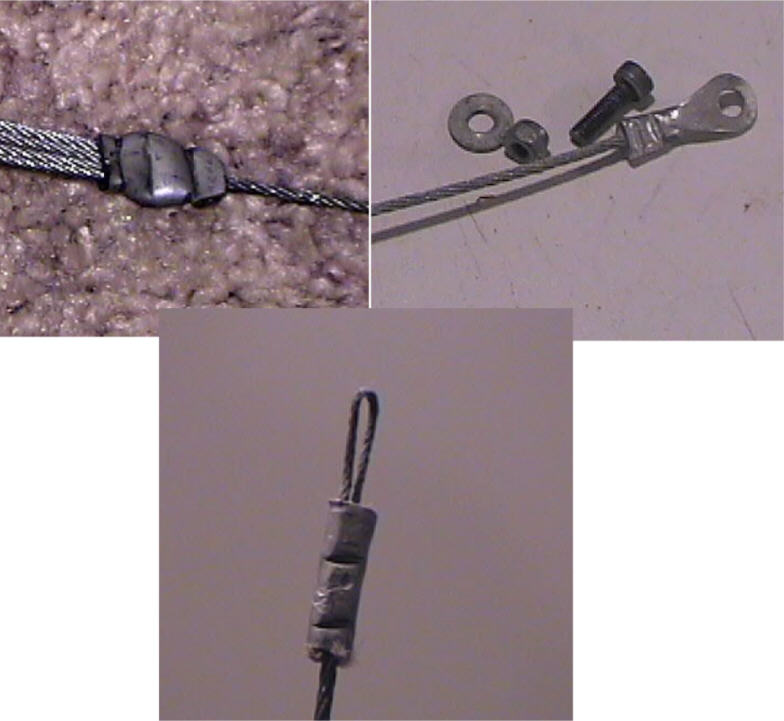 Use the 16-14awg cable stud crimps and take off the insulation. Cut 4 equal lengths of 1/16" cable about 1 to 2 feet long. crimp the stud crimps on one end making sure ther is no cable strands sticking through the crimp's slit. Turn them so that the flat side of the crimp faces the inside of the bucket. they will be facing 4 diferent directions. Cut another length of cable no longer than 3 feet long. Take the 5/16" steel tubbing and with the 4 lengths turned the just the right way and the last length of cable and crimp them with BIG crim pliers or something that will smash them together, ALL while holding their positions!! its a hard task to do but done right, will keep the cables in their right positions. The last part is to take a large crimp and some kite string and make a loop to go on the hook and crimp it all together. Make about a 1 1/2 to 2 inch loop. This keeps the metal seperated from the heli. I used kite string that is like 100lb test.
 |
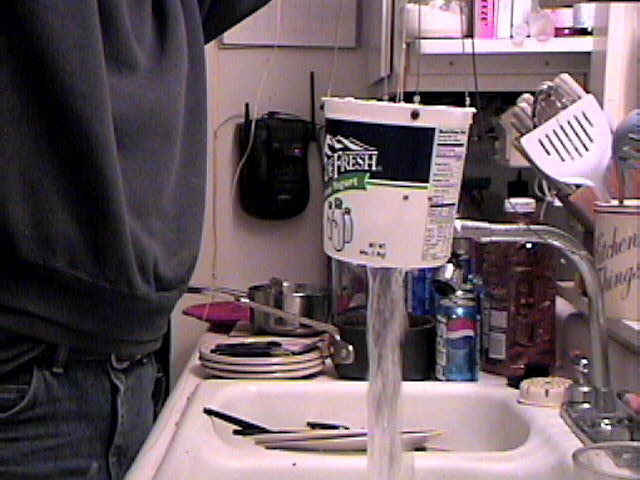 Finally, tie some kite string onto the plunger and test the bucket. hold the wire and the kite string in one hand and dip it into some water and see that the plunger settles to the bottom, flat as the bucket is raised. It should hold the water with out too many drips. Then take it all apart, scuff the inside and out and prime-paint-and clear in the normal way. DO NOT paint the very bottom of the inside of the bucket as this will give you ridges on the edge of the dump hole and you will have leaks. Just tape it off before you prime and take it off at the end.
 |


